
TL;DR:
- Grooved decking offers superior water drainage, slip resistance, and airflow compared to smooth surfaces.
- It is highly suitable for the UK’s wet climate, reducing moss buildup and extending decking lifespan.
- Proper installation and maintenance, including correct groove orientation and regular cleaning, are essential for safety and durability.
Most homeowners assume decking is decking — you pick a colour, lay the boards, and that’s that. But the surface profile of your boards is one of the most consequential decisions you’ll make for a UK outdoor space. Grooved decking, with its series of parallel channels running along each board, does far more than look good. It manages rainwater, improves grip underfoot, and promotes airflow beneath the surface. This guide walks you through everything you need to know: what grooved decking actually is, why it suits the British climate so well, which profiles and materials are worth considering, and how to install and maintain it properly.
Key Takeaways
| Point | Details |
|---|---|
| What grooved decking is | Grooved decking features channels along the board to boost grip and water drainage. |
| Safety and suitability | It’s a top choice for UK gardens because grooves reduce slip risk in wet weather. |
| Material choices | Choose from timber or low-maintenance composite, each with pros and cons. |
| Installation matters | Correct groove alignment and board spacing are key for best performance. |
| Maintenance essentials | Regular cleaning of grooves keeps your deck safe and looking good for years. |
What is grooved decking?
At its simplest, grooved decking is a board with one or more series of channels cut or moulded into its walking surface. As noted in our slip resistant decking guide, grooved decking features a series of parallel grooves along its surface, typically running the full length of the board. These channels are not decorative afterthoughts. They serve three clear functions: draining surface water away from foot traffic zones, allowing airflow beneath the board to reduce moisture build-up, and creating mechanical grip that reduces slipping.
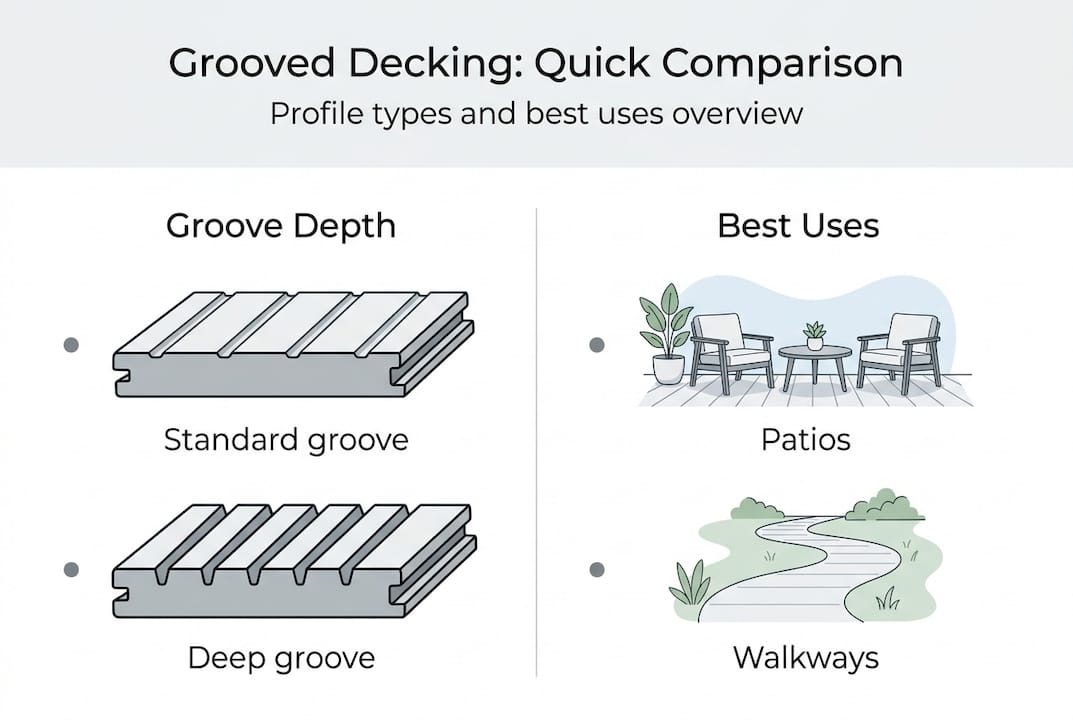
Groove depth and spacing vary by product. Shallow grooves of around 1 to 2 mm are common on composite boards, while deeper grooves of 3 to 5 mm appear on hardwood and softwood timber options. The width of each groove also matters. Narrow grooves shed water quickly but can trap fine debris. Wider grooves allow more airflow but may feel less comfortable underfoot in bare feet.
Grooved boards are produced in three main materials:
- Timber softwood (such as pine or treated spruce): affordable, widely available, but requires regular treatment
- Hardwood (such as iroko or ipe): naturally dense and durable, grooves hold their shape well over time
- Composite (wood fibre and polymer blend): low maintenance, consistent groove profile, resistant to rot
The UK’s wet climate is the main reason grooved decking has become the default choice for most garden projects here. Standing water on a flat smooth board is a slip hazard and accelerates surface degradation. Grooves address both problems at once.
| Feature | Grooved decking | Smooth decking |
|---|---|---|
| Water drainage | Excellent | Poor |
| Slip resistance | High | Lower |
| Debris trapping | Moderate | Low |
| Airflow beneath board | Good | Limited |
You will find grooved decking on family patios, garden walkways, poolside areas, balconies, and commercial terraces across the UK.

Main benefits of grooved decking for UK gardens
Now that you know what sets grooved decking apart physically, let’s dig into why these features matter in the British climate.
Slip resistance is the headline benefit. Wet weather is a constant in the UK, and a smooth board can become genuinely dangerous after rain. Grooves interrupt the water film that forms on flat surfaces, giving your foot something to grip. Our weatherproof decking solutions resource confirms that grooved decking improves water drainage and offers better slip resistance compared to smooth boards. For families with children or elderly relatives using the garden, this is not a minor upgrade.
Drainage is the second major advantage. When rain falls on a grooved board, water channels away from the surface rather than pooling. This matters for decking safety but also for the board’s lifespan. Standing water promotes algae, moss, and eventually rot in timber boards.
Pro Tip: Orient your grooved boards so the channels run away from the house and towards the garden. This directs water away from the structure rather than back towards the wall or foundations.
| Consideration | Grooved | Smooth |
|---|---|---|
| Wet weather slip risk | Low | High |
| Moss and algae growth | Reduced | More likely |
| Maintenance frequency | Moderate | Higher |
| Typical cost | Slightly higher | Lower |
| Visual style | Textured, natural | Clean, minimal |
Airflow is the third benefit that most buyers overlook. The grooves create tiny channels that allow air to circulate across the board surface, which slows moisture retention and reduces the conditions that encourage rot and mildew. This is especially valuable in shaded gardens where boards dry slowly after rain.
Grooved decking is particularly well suited to:
- Family patios where children and pets run around in all weather
- Shaded areas under trees or pergolas where drying is slow
- Garden walkways connecting different zones of the garden
- Raised decks and balconies where drainage is critical
- Poolside areas where water is a constant presence
Popular types and profiles of grooved decking
Having seen the benefits, next comes choosing the right grooved decking profile and material to match your outdoor plans.
Not all grooved boards are the same. The profile, meaning the shape and depth of the groove, affects how the board performs and how it looks. Here is a breakdown of the main options available in the UK today:
| Profile type | Groove depth | Best for | Pros | Cons |
|---|---|---|---|---|
| Standard groove | 2 to 3 mm | General patios | Balanced grip and drainage | Can trap leaves |
| Micro-groove | Under 1.5 mm | Barefoot areas | Comfortable underfoot | Less drainage |
| Wide groove | 4 to 5 mm | High-traffic areas | Maximum drainage and airflow | Less smooth feel |
| Dual-sided groove | Varies | Versatile installations | Two finish options per board | Slightly heavier |
Material choice shapes the groove’s long-term performance. Timber boards, whether softwood or hardwood, are cut to shape and the groove profile can change slightly as the wood expands and contracts with seasonal moisture changes. Hardwood grooves stay sharper for longer due to the density of the material.
Composite materials are increasingly common for grooved decking, offering lower maintenance and longer life. Composite groove profiles are moulded during manufacture, so they remain consistent throughout the board’s life. They do not swell, shrink, or splinter. For most UK homeowners, this consistency is a significant advantage.
You can explore a wide range of decking design examples to see how different groove profiles look in finished garden settings before committing to a style.
The most popular grooved profiles for UK gardens right now include:
- Composite dual-sided boards with a grooved face and a smooth reverse
- Treated softwood with standard grooves for budget-conscious projects
- Hardwood grooved boards for premium, long-lasting installations
- Recycled plastic grooved boards for eco-focused homeowners
Essential installation tips and common mistakes
The right material and profile are only part of the equation — your installation approach also makes a big difference.
The single most important installation decision is groove direction. Correct groove orientation and board spacing are vital for drainage and longevity. Grooves must run perpendicular to the house wall, so water flows away from the building. If you lay boards with grooves running parallel to the house, water channels towards the wall instead of away from it.
Here are the key stages for laying grooved decking correctly:
- Prepare the subframe — use treated joists at 400 mm centres for composite, 600 mm for hardwood
- Check the fall — ensure the deck slopes away from the house at a minimum of 1 in 80
- Lay boards groove-side up — this sounds obvious but upside-down installation is a surprisingly common error
- Maintain board spacing — leave at least 5 to 8 mm between boards for drainage and expansion
- Secure with hidden fixings — clip systems designed for grooved boards keep the surface clean and allow for movement
- Check the perimeter — fit end caps or fascia boards to finish exposed edges neatly
For a detailed walkthrough, our decking installation tips and fitting composite decking guides cover each stage with photos and measurements.
Pro Tip: Before you begin, check with your local council about planning requirements. Decking over 300 mm in height or covering more than 50% of your garden may require permitted development approval.
Common mistakes to avoid include installing boards upside-down, using the wrong fixing type for grooved boards, and ignoring the drainage fall on the subframe.
Looking after grooved decking: Cleaning and maintenance best practice
Care doesn’t stop after installation — here’s how to keep your grooved decking looking good and safe year-round.
Grooves are excellent at draining water, but they can collect leaves, grit, and organic matter over time. Left unchecked, this debris becomes a breeding ground for moss and algae. The good news is that grooved decking is less likely to develop standing water and algae if cleaned regularly, which makes the maintenance task manageable.
Essential cleaning steps for grooved decking:
- Brush along the grooves with a stiff-bristled brush every two to four weeks during autumn and winter
- Remove debris from channels using a flat-head screwdriver or groove-cleaning tool after leaf fall
- Power wash carefully at low pressure (under 100 bar) along the groove direction, not across it
- Apply a moss and algae treatment in spring and autumn, especially in shaded areas
- Inspect for rot or mould at the start of each season, particularly on timber boards
Blocked grooves are the leading cause of slippery decking. A clean groove drains water in seconds. A blocked one holds it for hours. Never skip the groove-clearing step, especially heading into winter.
For timber boards, apply a UV-resistant oil or decking stain every one to two years to protect the wood and preserve the groove profile. Composite boards need only cleaning, with no oiling or staining required. Our full decking maintenance process guide covers product recommendations and seasonal schedules in detail.
In the UK, aim for a thorough clean at least twice a year: once in spring to clear winter build-up, and once in autumn before the wet season begins.
The real trade-off with grooved decking: What most guides miss
Every guide you read about grooved decking will tell you it drains better and grips more. That is true. But there is a nuance worth understanding before you commit.
Deep grooves are brilliant in wet weather but they demand more consistent cleaning. A family with young children who use the garden heavily will find that grooves collect sand, soil, and food debris faster than a smooth board would. The grip benefit is real, but it comes with a cleaning commitment. If that commitment slips, deep grooves can actually become more hazardous than a well-maintained smooth board.
We have also seen homeowners choose maximum-grip profiles for aesthetic reasons, then find the texture does not suit their garden’s style. A sleek, contemporary garden often looks better with a micro-groove or capped composite board that offers grip without a heavy textured appearance. Explore garden decking impact to see how profile choice shapes the overall look of a finished space.
The honest advice is this: match the groove depth to your actual lifestyle. A low-maintenance household with a shaded, damp garden benefits most from wider grooves. A family who sweeps the deck daily and prefers a sleek finish may be better served by a micro-groove composite. Neither choice is wrong. The mistake is choosing on grip alone without thinking about cleaning habits and visual preference.
Find the perfect grooved decking and installation support
Armed with insights about grooved decking, the next steps are simple.
At Deck Kingdom, we supply a wide range of grooved composite boards, composite decking end caps, and decking accessories to help you finish your project properly from board to edge. Whether you are planning a small patio upgrade or a full garden transformation, our team can help you choose the right profile and material for your space.

We also offer a step-by-step decking checklist to guide you through every stage of your project, from measuring up to final fixing. Free samples are available so you can see and feel the groove profile before you order. Get in touch with us directly for personalised advice on your outdoor renovation.
Frequently asked questions
Is grooved decking more slip-resistant than smooth decking?
Grooved decking generally provides better slip resistance in wet conditions because the channels interrupt surface water, giving your foot grip. Our slip resistant decking guide confirms that grooved boards improve slip resistance and water drainage compared to smooth alternatives.
What materials are used for grooved decking?
Grooved decking is most commonly made from timber (softwood or hardwood) or composite materials, each with different maintenance needs and lifespans. Composite materials are increasingly common for grooved decking, offering lower maintenance and longer life than timber options.
How do I clean grooved decking?
Most grooved decking can be kept clean with regular brushing along the channels, occasional low-pressure power washing, and routine moss checks in spring and autumn. Keeping grooves clear is the most important step, as blocked channels hold water and increase slip risk.
Are there building regulations for installing grooved decking?
Some local councils have rules covering deck height, drainage, and safety, so it is worth checking before your project begins. Decking above 300 mm in height or covering a large portion of your garden may need permitted development approval.
